Whatever electrical function we want to integrate in our clothing, it has to have at least one switch, to switch this function on and off.
To make an electrical textile switch is easier than you might think, especially by following the instructions worked out by Leah Buechley.
Based on the idea and DIY instruction from Leah, we show how to create a single switch that uses only textile materials. With this instruction, you can create your own versions with multi switch keyboards or give them different shapes.
Please visit Leah’s Website for detail information where to get the materials. She has links for each item needed that helps you to find out where to buy them.
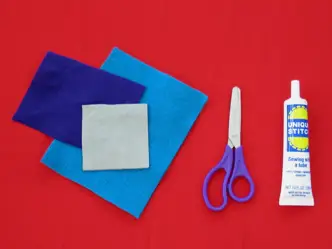
What you need to make a textile switch:
- Fabric glue
- Patch conductive fabric
- Patch of felt, wool or a similar thick, springy material
- Patch of fabric for the outside of the switch
- Scissor
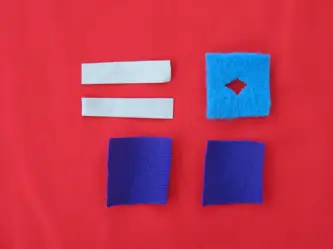
Start by cutting out a square of felt. This will be the soft and springy center of your switch. Cut a hole out of the center of this felt square you just created. Now cut out two squares of fabric. These will be the outsides of your switch. Next, cut two strips of conductive fabric for the contacts in your switch. Each strip should be slightly longer than the felt square you cut and just wide enough to cover the hole in the felt.
You have now all of the pieces needed for your switch. The basic idea is that the two pieces of conductive fabric strips will be on either side of the felt square. When you press the center of your switch, the conductive strips will contact one another through the hole.
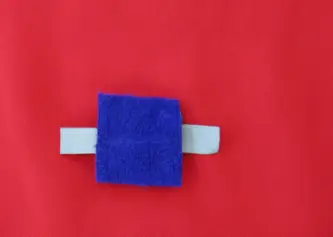
The strips will extend outside of the rest of the switch construction so that you can stitch them down with conductive thread to integrate to the rest of your textile electronic garment. The other pieces of fabric (the purple squares) will be the outside of the switch. Any color and shape you wish can be made, it’s up to you imagination and taste.
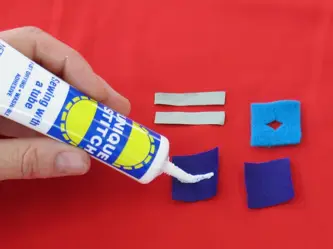
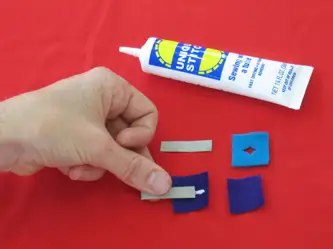
Now, glue the conductive strips to the exterior fabric.
Glue the conductive stripes to either side of the outside felt squares. Align the conductive strips so that they will contact one another through the hole in the felt when the switch is pressed, but will not contact each other otherwise.
You are done now, your first fully textile based switch is ready for use. Of course, this switch can be washed just like any other textile product.
The great thing about textile electronics is that you can easily create different shapes without much effort, just cut instead of a square a circular shape or a silhouette of a flower or . . . the sky is the limit.
We like to refer you to the creator of this concept and the DIY instruction shown here, Leah Buechley to get more in-depth information.

